You’ve seen the images from San Diego Comic-Con every year. The cosplayer costumes and props are more elaborate, more intricate, and just more awesome.
Even if you don’t have a cosplay hobby, you might remember the days of elementary school plays where your mom (or dad) would use a good ole needle and thread to make your costumes?
That’s where this list of the Best 3D Printer For Cosplay can help.
Needle and thread will get fans only so far nowadays with the trend for authenticity and realism. Cosplayers want to be as accurate as possible when it comes to costumes and the $20-$80 costumes and props on Amazon aren’t detailed enough.
With the limit often only being your imagination, it’s not a question of Can I print it? But instead, What should I print first?
This is a long post as I get into the details of the 3D printers and give you a complete buying guide with questions to ask yourself. I’m only giving 3 suggestions because you don’t need 10+ “best printers.” You just want the cream of the crop. But for those who do want to have more options, I’ll include a few more.
So here’s the list of my top 3D printers first in case you’re in a hurry.
Cosplay Costumes and Props to 3D Print
Those that are new to the 3D printing world may wonder how to use a 3D printer for cosplay, and just how effective it is. The truth is, 3D printers are the stepping stone to your creativity.
Cosplay lets you pretend you’re from the world that’s been created from your favorite comic books, game, manga, anime, cartoons, films, and more. Many will 3D print miniatures and others like to print larger objects.
Many use a 3D printer for cosplay designs that are far too complicated to produce with a needle and thread. Maybe you want to create a costume or prop with never-before-seen features or colors, that’s all possible.
Some examples of what 3D printers are capable of producing are:
- Full body costumes such as Melissa Ng’s Dreamer Regalia 3D printed cosplay armor for actress Felicia Day.
- Augmented props to compliment any cosplay, such as a 3D printed Mad Max prosthetic arm.
- A full Iron Man suit of armor can be 3D printed down to the finest detail, recently seen roaming Comic Con.
- A 3D printed Ultron mask from Avengers: Age of Ultron.
- You can print a range of Overwatch items, even going as far as to print an entire character’s outfit.
- Even your childhood can be printed with designs for every item in Zelda.
- And of course, printing weapons is a common theme amongst those printing cosplay props.
Best 3D Printer for Cosplay
1. LulzBot Taz Workhorse – Best Overall
The LulzBot Taz Workhorse is the best 3D printer out there for intermediate to advanced 3D print enthusiasts.
LulzBot is known for its print quality and printing speed, and the Taz Workhorse doesn’t disappoint. LulzBot 3D printers are the workhorses in the industry, providing reliability and amazing prints each time around.
The build volume of 280 mm x 280 mm x 285 mm (11.02 in x 11.02 in x 11.22 in) on the Taz Workhorse is a huge plus as it allows for large prints of cosplay gear. Or if you want to print multiple pieces of small cosplay props, you can do that at the same time.
You’re able to set your layer thickness between 0.05 mm to 0.40 mm as well, so it provides you the flexibility to get as detailed as you want on your printed object. I’d suggest going with higher layer thickness of 0.2 – 0.4 mm for those large props to cut down on printing real time.
The Taz Workhorse has automatic bed leveling and adjustable temperature, so you don’t need to worry about some common 3D printing issues. It also supports a wide array of multiple filament types, so your printing materials and printing process won’t be limited.
Additional features include the open frame design and modular tool head carriage design that allows for plug and play capabilities with various print heads. I personally like having open, metal frames as it makes troubleshooting and maintenance much easier.
With so many great features and benefits, the LulzBot Taz Workhorse does come in at a higher price point. If you’re an absolute beginner, this probably isn’t right for your cosplay 3D printing needs. If you must have high-quality 3D prints, then the Taz Workhorse is for you.
The Taz Workhorse is easy to use and has a friendly interface, but you may want to go with a cheaper 3D printer to learn on. That’s where the Creality CR-10S comes in.
2. Creality CR-10S – Best Budget-Friendly
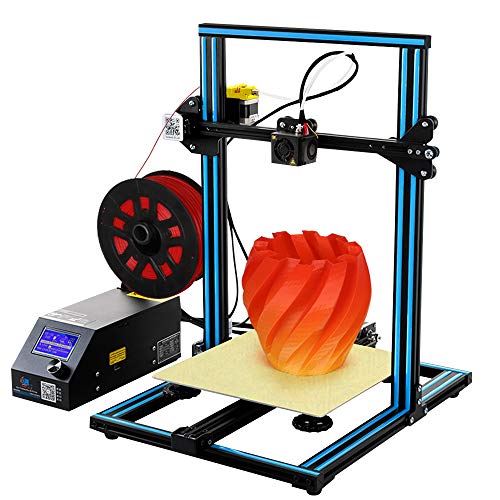
The Creality CR-10S is probably the best printer under $500 with all it gives to users 3D printing cosplay gear at home.
The most important feature besides the price point on the CR-10S is the large build capacity of 300 x 300 x 400 mm (11.8″ x 11.8″ x 15.8″). But wait, isn’t that slightly larger than the LulBot Taz 6 above?
Good eye there. The build capacity sure is larger. The difference comes in the details and how much of it you want. If you’re looking for the fine details in your print resolution quality, you’ll want the Taz 6. The CR-10S will still give you good quality prints, but just not at the Taz 6 level.
I’ve also found the build plate can get a little uneven, so it’ll take a bit more work to level the bed. With the lower budget-friendly price, you’ll need to put in a little more elbow grease overall for your printing projects.
If you ever happen to lose power during a print session, the CR-10S has a Resume Functino that will allow you to pick up from the last layer. That’s going to save you a lot of time and heartbreak, especially on those large cosplay prints.
3. Dremel Digilab 3D20 – Best for Beginners
Dremel is known for making some of the most reliable consumer-grade 3D printers for education, from beginner K-12 to higher education.
The Dremel Digilab 3D20 is a part of the Dremel ecosystem that is about educating and supporting 3D printing users. Benefits include world-class customer support to go with their 1-year warranty. They have free cloud-based slicing software that’s easy to use.
Dremel provides a huge amount of free 3D models that might be able to help get your cosplay design needs fulfilled. Their goal of helping users get to their first print quickly doesn’t stop there.
The Digilab 3D20 printer comes completely pre-assembled out of the box with a 0.5kg spool of filament and setup installation guide. The full-color LCD touch screen offers a user-friendly interface to modify settings.
For absolute beginners and those who don’t want a complicated print process when 3D printing cosplay prints, the 3D20 might be for you.
Best of the Rest
As I mentioned, these are some of the other great 3D printers that didn’t make the short list. They’re all great in their own right, but just missed the top three.
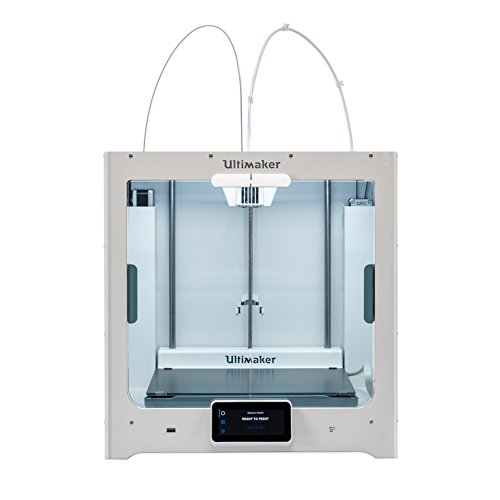
Ultimaker S5 – Best for Experienced with dual extrusion capability for multi material printing prints
Robo R1+ – Great affordable option that’s easy to use
Monoprice Voxel – Cheap 3D Printer, but has smallish build volume
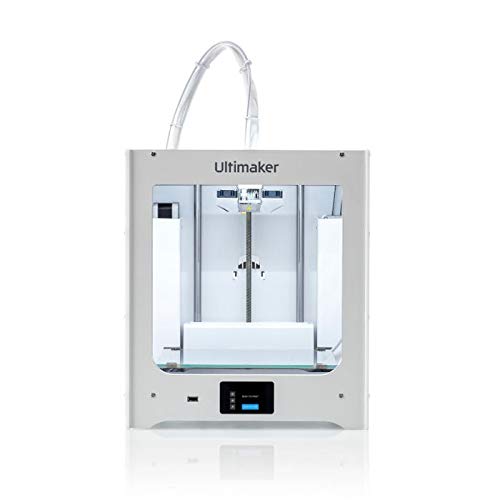
Ultimaker 2+ – The younger sibling of the Ultimaker 5 with smaller print volume
Cosplay Design and Printing Considerations
Before rushing off to buy the first 3D printer you can get your hands on, there are some important factors to consider. Different 3D printers have different printing processes, and widely different capabilities from each other.
This means that it’s important to consider the general idea and specifics of your printing needs before finding the best 3D printer for your needs.
Here are some design, printing, and finishing related areas to consider.
3D Model Design Details
Before printing begins, there needs to be 3D model designs. This involves creating 3D models on the computer with 3D modeling software. Then printing from those 3D design files directly.
Some examples of the most common 3D model software used for 3D designing these days are:
Don’t worry if you don’t know how to design 3D models to take advantage of what a 3D printer can do. Many cosplayers employ the help of 3D model designers to design the objects for them, and some even buy directly off a 3D model marketplace.
When pursuing 3D models, there are two approaches. You can seek out a Freelance 3D designer on Fiverr and work with them directly to design your cosplay model. Or you can pursue a more professional marketplace, and buy premium models directly off them.
Once you’ve gotten better with 3D designing and modeling yourself, you can also have a side hustle selling 3D designs to make money.
Achieving high quality 3D print cosplay models also depends on the fine detail in the 3D designs. One issue with intricate designs is that more layer resolution is required, which means you’ll need more power from your printer.
Designs will also affect your print materials, print speed, and print costs.
Experienced 3D modelers will be able to tell if a model is within acceptable levels of detail, and know if a model will not be produced as seen on the screen by a certain printer.
Size and Scope
We all want to print large cosplay costumes like your Hulkbuster costume, but that’s a lot of large parts.
One of the most important aspects of your 3D cosplay project is to define how large your cosplay model pieces will be. Are you looking for full armor sets?
While there are absolutely 3D printers out there that could print a full body suit for you, they are industrial grade machines with a large build volume and build capacity.
For home users, your printer will have some clear limitations to the size of the model it can produce. But that doesn’t mean you can’t print high-quality prints either.
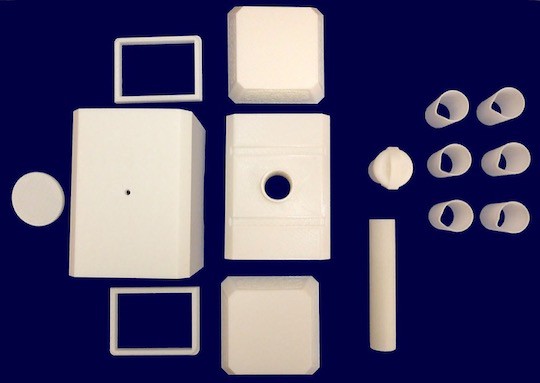
If you want to print a large prop, you can print multiple pieces and join them together during post processing (more below).
When picking a 3D printer to use for your cosplay needs, always consider the size of what it can produce within your build area, and then consider how this would work for your own ambitions.
Printer Filament Materials
3D printers are capable of using a wide variety of materials to print objects, with many of them having benefits and disadvantages over each other when it comes to certain printing methods. Choosing the right printer filaments is often a design choice, and should be considered carefully.
Some of the most common materials used are:
- PLA (Polylactic Acid)
- PETG (Polyethylene Terephthalate Glycol-modified)
- ABS (Acrylonitrile Butadiene Styrene)
- Ceramic
- Metal
- Wood
- Nylon
- Resin
When it comes to cosplay, these materials can be used in a variety of ways. For example, if you’re producing a sturdy prop, many will choose a tougher material such as Resin for its durability and longevity. A drawback with resin though is it comes with a little weight.
For smaller objects, such as trinkets to complement cosplay costumes, nylon is often used. You’re able to print far higher layer resolution than other standard filament types.
Wood and metal materials are also used for their durability, such as when printing a full body Fallout power suit. This comes with immense weight to the models as a result.
However, one of the most common materials used in cosplay is ABS (Acrylonitrile Butadiene Styrene), a type of plastic. This is due to its incredible strength, light weight, and heat resistance.
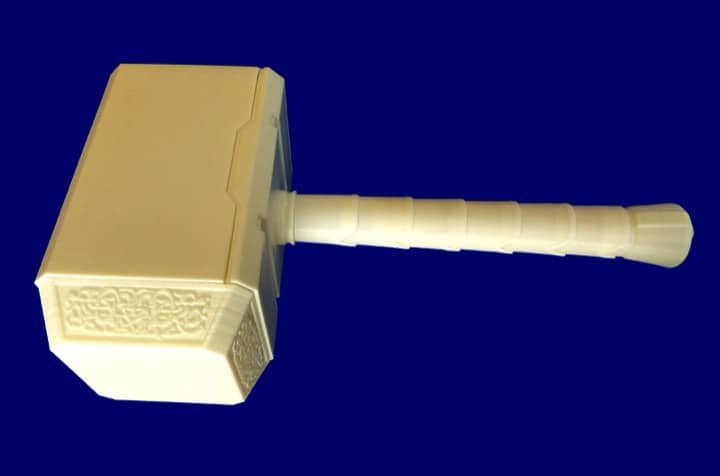
All of this makes ABS prime material for producing large full-body cosplay costumes, as it won’t weigh you down as you strut your stuff at the local comic-con.
It is also one of the few materials that works well with most adhesives, such as super glue. This makes it a good choice if you need a little post printing construction.
You’ll also want to get a 3D printer that has a filament sensor to detect when you’re out of printing material. These filament detectors will save you in making sure you have enough available filament to continuously print.
Post Processing and Finishing
The vast majority of 3D models printed will require some form of post processing to get them ready for cosplay. In short, post processing refers to anything that is required to be done after the model is printed.
Depending on the nature of the cosplay you are pursuing, you’ll already have a pretty good idea of the kind of post processing you might need to do. Some steps might not be so obvious.
You may not follow every step listed here as part of your own post process, but many of the common post processing techniques are:
Cleaning
When models are printed, they will come with a layer of support material. This is the jagged edges you may have spotted on freshly printed models. To remove support material, it will depend on if the material is soluble or insoluble.
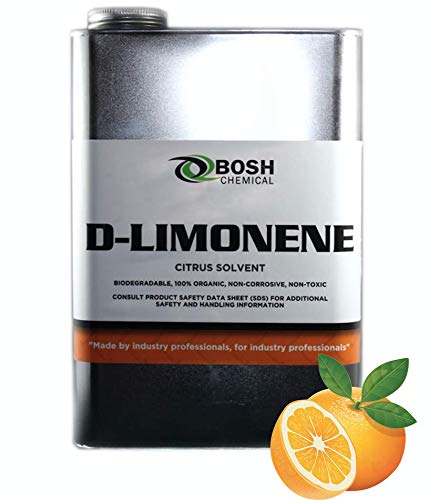
Using a chemical called D-Limonene, soluble support material can be removed with a simple submerging of the model. Over time the chemical will break down only the support material, leaving you with the smooth edges of your primary material. You can pick one up like this MG Chemicals d-Limonene (Pure Grade) Cleaner on Amazon.
Insoluble support material is a much more difficult post processing step. You will have to use tools such as pliers or knives to carefully remove the jagged edges yourself. It’s for this reason that soluble support material is much more popular.
Fixing
As any seasoned cosplayer that 3D prints their costumes will tell you, you’ll need to learn how to fix minor damages in your models. Depending on the material you’ve chosen, and the printer you’re using. You will have to keep a close eye out for any small cracks and holes in your models.
There are a range of fillers, and hardeners, designed specifically to help deal with this problem. The exact fillers and hardeners to use depends again on the material of the model you are repairing. So always make sure you have the right tools for the job.
Fixing can also involve gluing together parts during an assembly process, and even welding for those stronger joints. For example, anything printed in ABS can be welded and glued together using acetone.
Curing
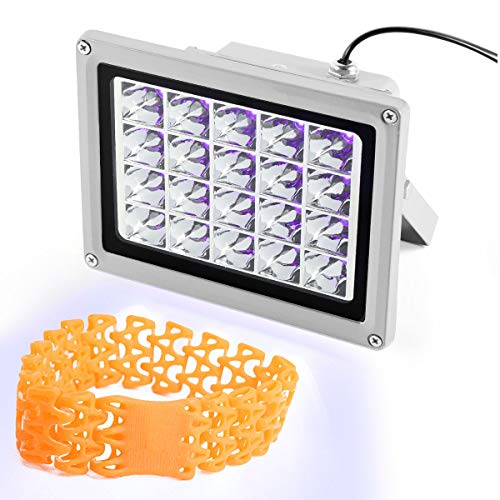
This step is often employed more heavily in professional 3D printing, but it’s also possible to do it at home. The act of curing a model is a lot like baking it, and by doing so, it enhances the structure of the material. Most commonly, models are cured under UV light like this UV Curing Light on Amazon.
This step, unlike all other post processing steps, is not only a cosmetic one. Curing can greatly improve the strength of certain materials, making it invaluable in producing a cosplay that won’t break on you.
Surface Polish and Finish
Just about every model printed will require this step. Sanding and polishing models will improve their look significantly, and depending on the grit of your sandpaper, can even help remove those last stubborn support materials.
This is most helpful at removing layer lines, the lines where each layer of plastic has been printed together. Much like sanding wood to remove harsh grain lines, layer lines can be smoothed off and polished away.
Coloring
Depending on the printer, models can be colored in the printing step. However, you can also opt to paint your models in the post processing step.
It is recommended that if you plan to paint the model, to print it in white. Then apply a layer of primer, and coat it using spray paint. From there, you can use a brush to add in the smaller details.
One note on glowing features or metallic finishes. You need to choose filaments that will get you that effect, as well as choosing a printer that can print with those filaments.
When it comes to post processing, it’s always important to pay close attention to the material you are using. Each material will have different methods of handling post processing.
How to Choose the Best 3D Printer for Cosplay – Buyer’s Guide
When picking a 3D printer for cosplay, it’s important to take in some key considerations before running out and buying the first printer you see. 3D printers come in a wide range, and are all designed to perform better at certain printing processes.
3D printer features, benefits, and specifications you should consider when buying a 3D printer.
Reliability and Durability
Always do research about the 3D printer you are thinking of buying. Specifically, look at the reviews for the printer. Do people often use it to produce cosplay? Do they say the model is reliable? Or did they run into problems?
Many 3D printers, especially on the cheaper end, will also have durability issues. Such as low-grade parts that break easily or problems with using certain materials with the printer’s build quality.
Always look for the 3D printers that have users and find 3D printer models with a good track record.
Build Volume / Bed Size
The cost of a 3D printer can often be tied to the size of the build volume. A large build volume provides large print volume, so you’ll be able to 3D print large objects.
Smaller printers, that produce smaller models, will be much cheaper than their larger counterparts. So, it can be tempting to seek out a small printer to save a little money.
However, if you plan to produce cosplay items with your printer, then you should be looking for a build volume that matches the size of the models you want to produce. The smaller the volume, the more you will have to cut up your models and spend hours in post processing putting them all back together.
For many costumes, a smaller printer simply won’t work. As many of the pieces need to be printed in single blocks to make them strong enough to wear.
Always look closely at the build volume you are aiming for, and find a printer that matches that standard.
Technical Features
When looking at a 3D printer, pay close attention to its resolution, build speed, and precision. These will play a big role in the limitations of your printer, and what cosplay items you can print.
If you’re looking to print large intricate designs, then you will need to make sure the printer can support the resolution of your model, and have the precision to produce the details you’re modeling.
You’ll need a printer that has a decent build speed as well, since larger and more complicated models will require more work, and thus more time.
If you’re unsure how to judge a printer’s ability, always look to see what the professionals are using. Many 3D printer retailers will also have ample support to get you in the know about a printer’s ability.
Nozzle Diameter
The nozzle diameter on your printer refers to the size of the nozzle that prints your models. Think of it like the brush of the whole machine. The diameter of that nozzle is an often-overlooked feature, but can make a big difference to the print quality of your models.
The most common nozzle diameter is 0.4mm, considered to be the best all rounder for printing a wide range of objects. There are nozzle sizes from 0.1mm all the way to 1.0mm, and depending on the thickness of the walls, and the resolution of your model, you may be recommended to use a certain nozzle diameter.
A thinner nozzle diameter will give you a more delicate build, whereas a thicker diameter will give you a much sturdier build. Much the same way a brush stroke works.
Layer Thickness
Certain models will require more thickness in their layers than others, and if you find yourself needing to produce more robust builds, then you will need the right 3D printer to deliver that.
Layer thickness can be set on any printer, however using a smaller printer to produce thick layers will take much more time, and can risk breaking the model.
Using a larger, more capable printer will give you more freedom to add thick layers to your models.
Type of Printer Filament Material
There is a wide range of printer filament types that can be used to 3D print. Printer filament simply refers to the material used to produce the models.
Depending on the type of filament you wish to use, will depend on what 3D printer is best suited for you. Many 3D printers specialize in a specific filament type, and others are less suited to other filament types.
Always match your desired filament with the 3D printer you’re looking at buying, and make sure the printer performs well with that filament type.
Ease of Use
The final consideration of any printer is how easy it is to use. There’s a wide variety of 3D printers for different experience levels.
If you’re a beginner and you buy the greatest Pro 3D printer that all the experts are using, you may quit before too long because of how complicated the professional 3D printers can be. Many printers will be designed for industry professionals and you don’t want to be lost before you even begin.
Look for 3D printers that are targeted at users with your experience level. Look at what people are saying about the printer. Are people complaining about learning to use it? Or are they printing their first models with ease?
Final Thoughts
Whether you’re a beginner or have experience, you should now be able to know what type of 3D printer will be able to meet your cosplay needs.
Come back and refer back to the list of features and considerations when you’re ready to purchase your 3D printer.
If you’re ready to start building your cosplay costume and props, check out one of the best 3D printer for cosplay above! Click up arrow in the the bottom-right of the screen to go to the top of the page.
Photo credit: hammer by t_reg is licensed under CC BY-ND 2.0.

